Monday 24 November 2014

Tudors Construction Techinques

I decided to start this research at the Tudor ere as it was the first time that there was a noticeable different between the class and between formal and day wear. Different methods were being used and more fabrics were being used. Before Tudors men more oubliettes, breeches or hoses, tunics, cloaks and leather shoes. For formal occasions they would embellish there outfits to an extent with better fabrics and belts but not to the extent the Tudors went.
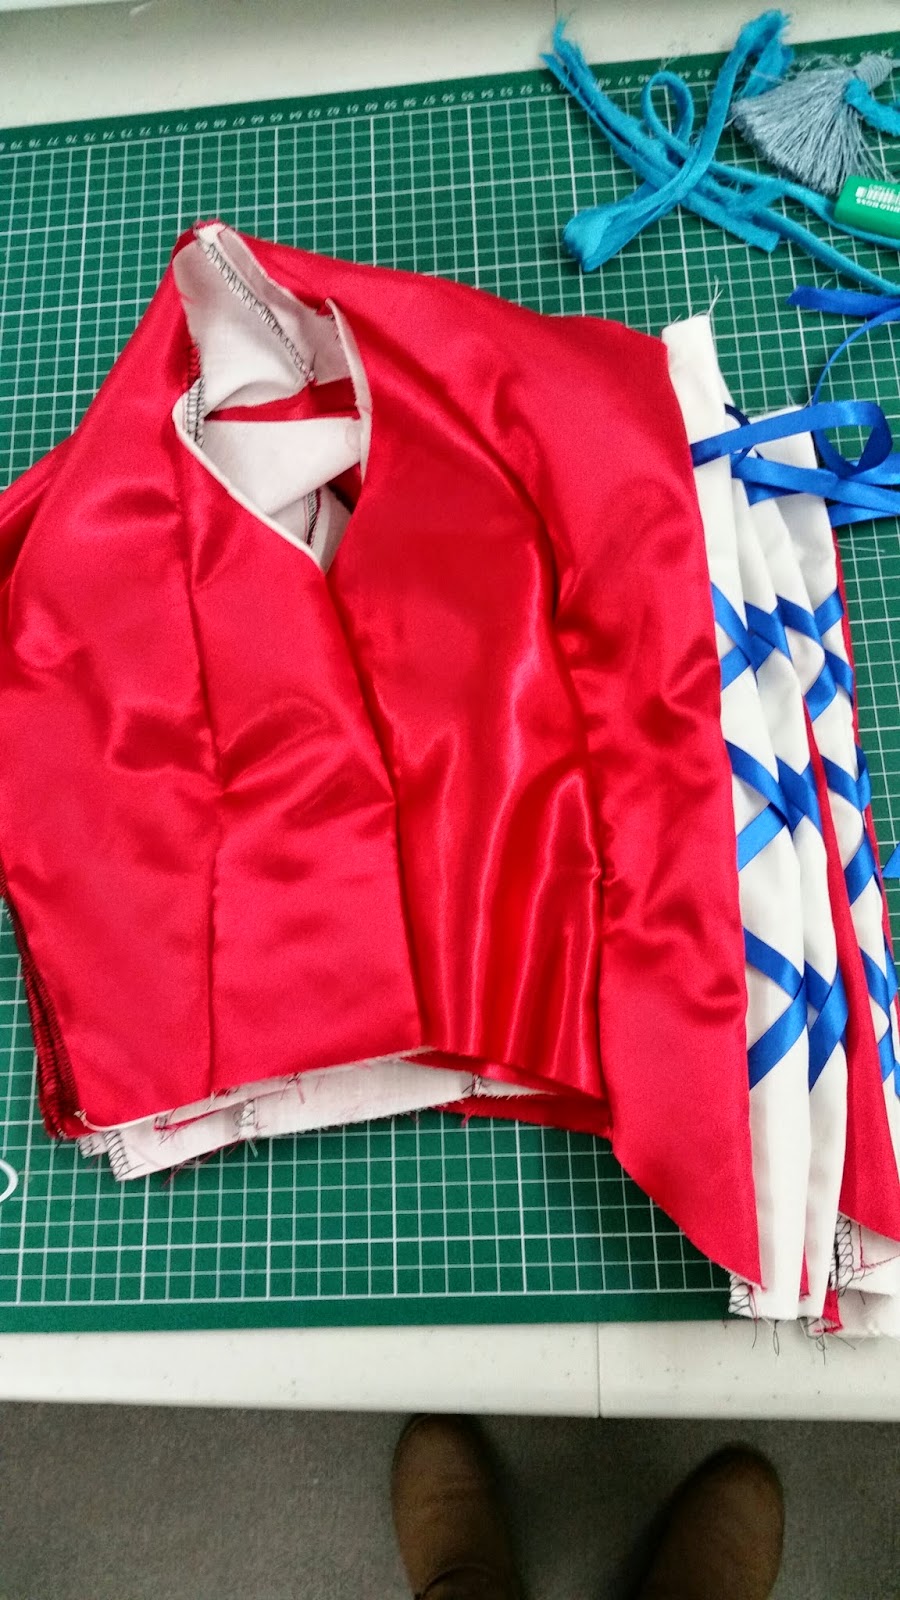
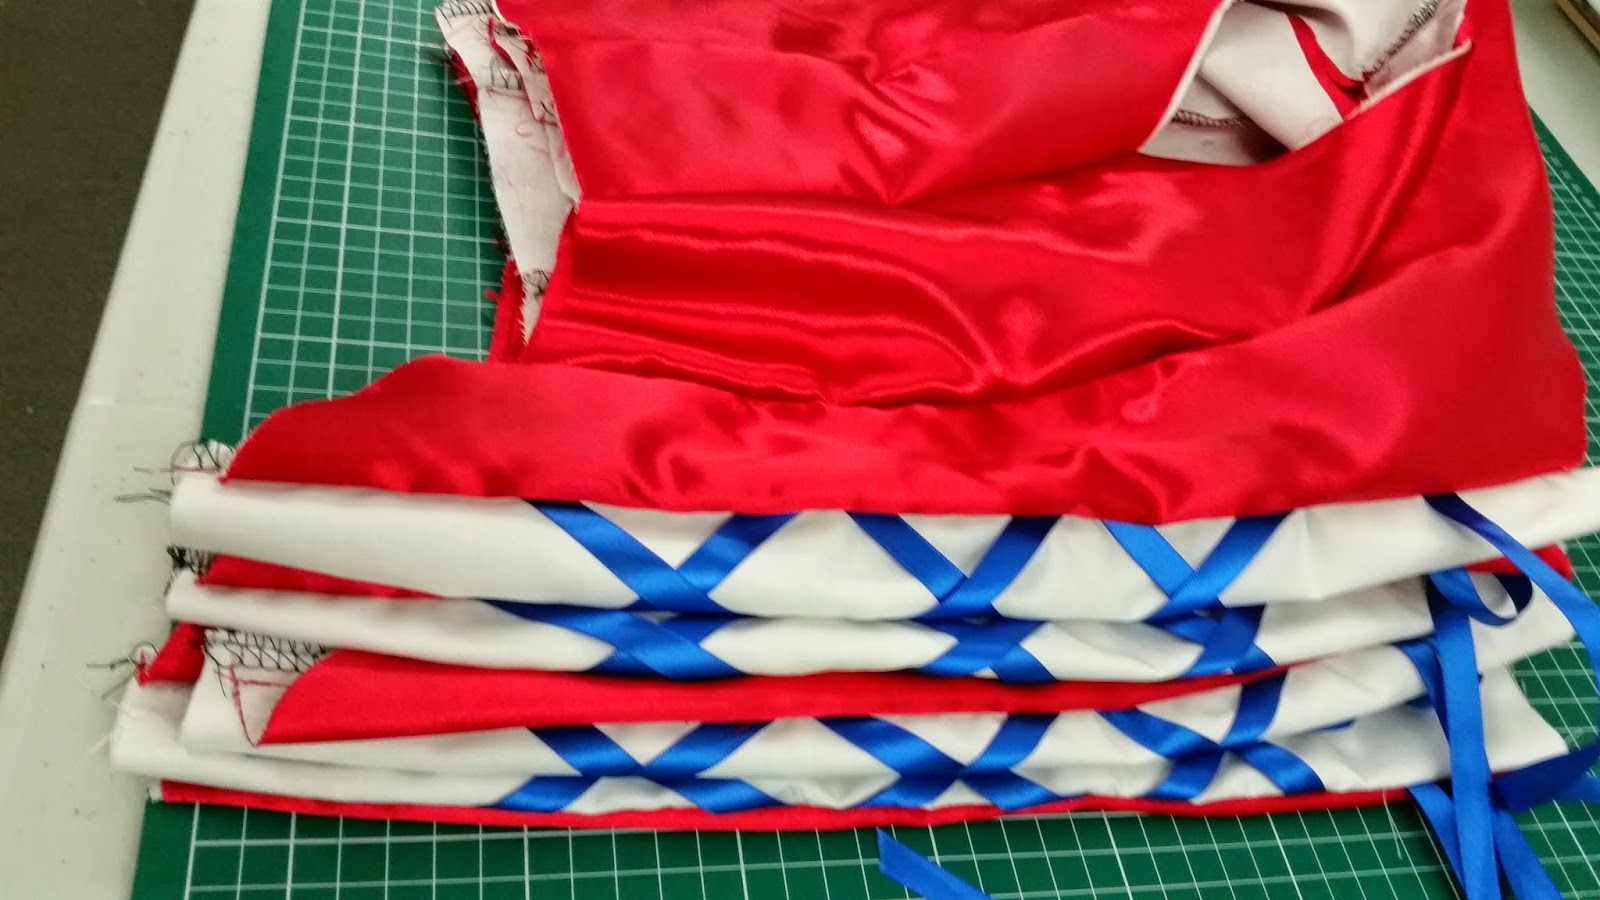
Garment Details:-

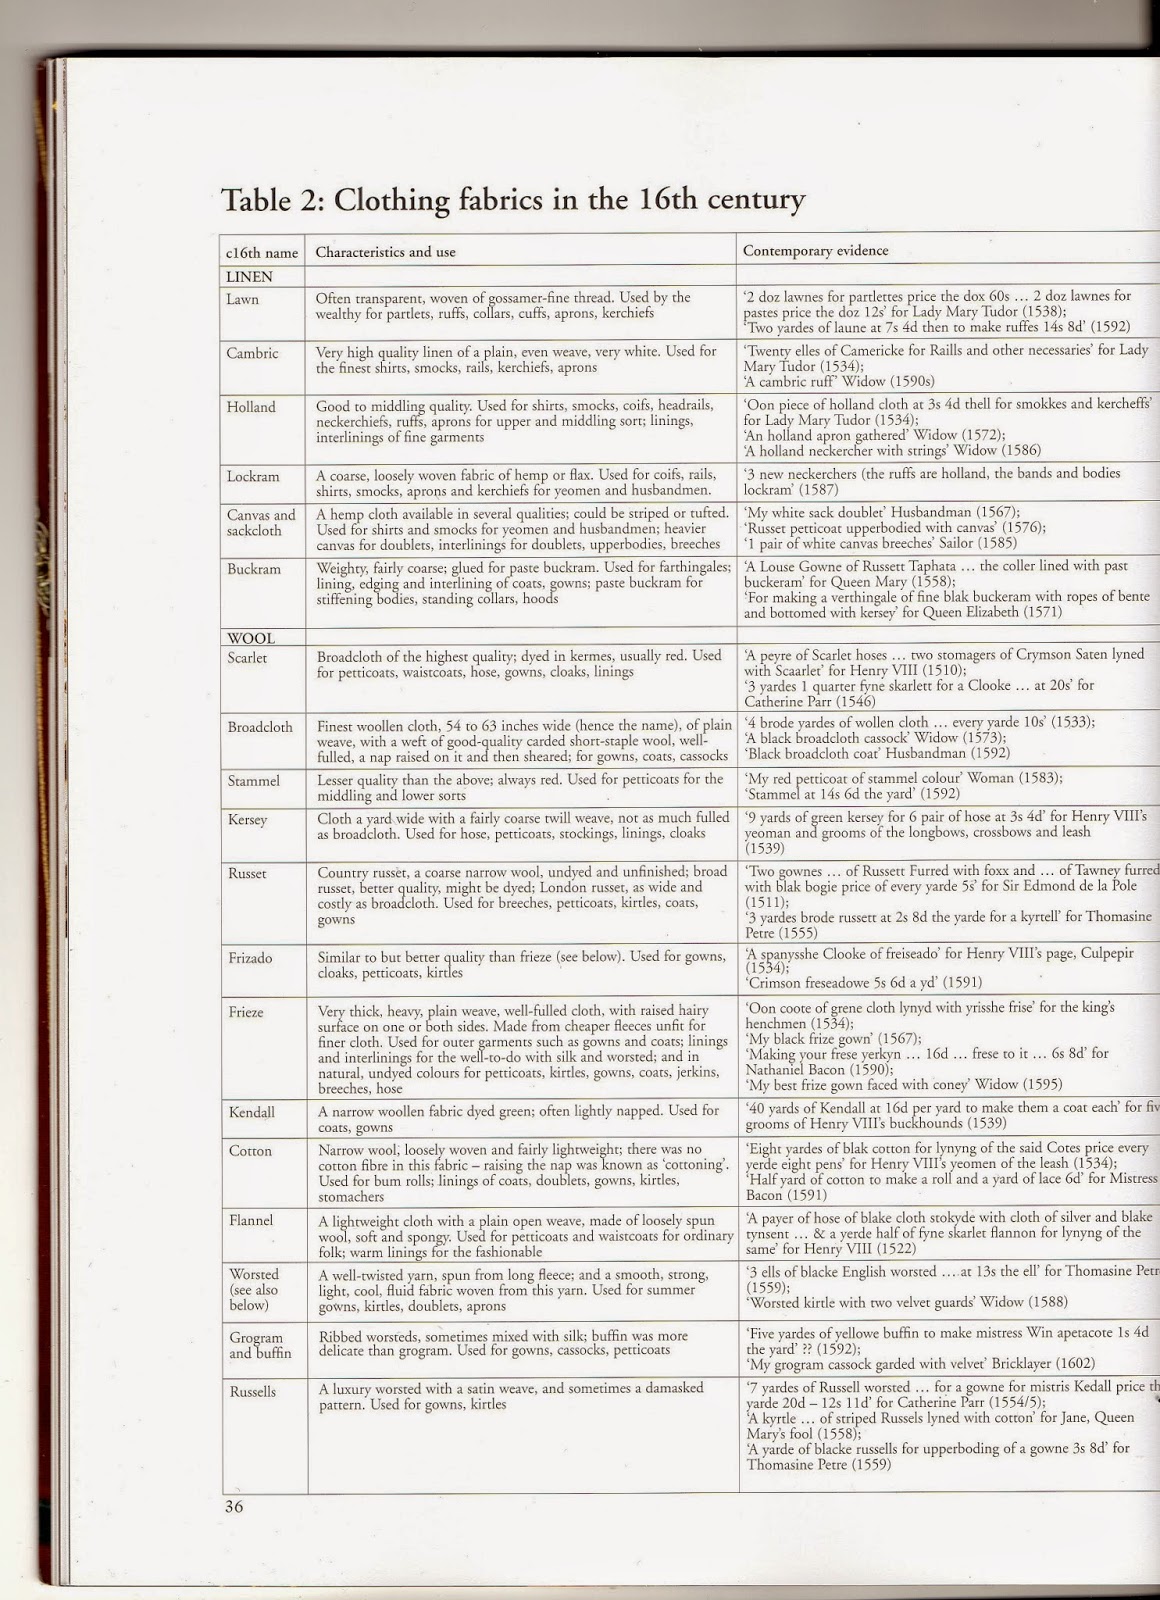
Fabrics used and how they were used:-


Techniques and Methods used:-
  • The stitches are all done by hand.
  • Basting is often used to keep layers together by hands. Stitches are removed once the garment is finished.
  • Binding and facing this is for finishing edges. Binding a strip of fabric encloses the raw edges and is visible from the outside of the garment. A facing is applied to the inside of the garment and is not visible on the right side.
  • Whipping This is used on bulky areas of garments. The fabric is whipped together to hold them.
  • Working with leather and fur:- thinner layers of leather can be sewn like other fabrics but thicker ones need special treatment. seam allowances are not added and edges are joined with a but stitch. A leather-working tool with a flat spike called an awl is used to make the holes for the stitches.two needles are threaded with waxed linen thread and the stitches are worked in tandem. The tension is pulled up evenly as the stitches progress. fur lining and facings had there edges finished before being inserted into the fabric. The edges were whipped together. Use cotton tape or bias binding for curved edges on the edge to keep strengthened.
  • Grading is used where a number of layers of fabric have been sewn together. Bulk is minimized by trimming each of the layers down by slightly different amounts.
  • Matching buttons to complete a garment are made by hand. Often using the same or complementing fabric. You can also make thread buttons.
  • Boning started to be used for corsets for both men and women.
  • Clothes started to be slashed and quilted to give garments texture.

  • Buttonholes are made by marking the area with a small box of tight stitches, cut the box and whip stitch the edge so it doesn't fray. Eyelets are made forcing forcing a knitting needle through the fabric without damaging the fibres. The edge of the eyelet is sewn tightly then bound like the button hole.
  • Hooks and eyes they sew on to each side of the fastening. Alternate hooks and eyes sewn to the inside edge of a garment. So it goes hook, eyes and hook and the alternative on the other side to stop the garment from coming undone.
  • Different types of gathering are used like knife pleats, box pleats and cartridge pleats. All of them used for different things and different looks to a garment.
Fun fact:- Boys wore skirts instead of breeches right up until they were 7 years old.

References:-
The Tudor Tailor by Ninya Mikhaila and Jane Malcolm-Davies
http://mens-fashion.lovetoknow.com/16th_Century_Fashion
http://www.renaissancetailor.com/demos_handtech.htm

Wednesday 12 November 2014

Notes from Ultimate Guide to sewing Tailored Jackets

Standards of A Well-Tailored Jacket or Coat:-
  • Garment has straight, thin edges, sharp corners, smooth curves and all handwork is inconspicuous.
  • Front edges, well finished edges on the vents, pocket flaps, lapels, collar points rolled in towards the body ( never outwards).
  • Seams and darts are smooth and straight with no crooks or puckers.
  • Facing and hem edges are attached so they don't show from the right side.
  • Sleeves hang straight without diagonal wrinkles in the sleeve cap.
  • Lining has enough wearing ease so movement does not cause strain on the fabric.
  • Buttons fit buttonholes easily and lifted away by shanks to prevent wear and strain.
  • Pockets lie flat and fit the curve of the body.
Tailoring Method see pages 65
Custom:- Traditional methods of tailoring but time consuming.
  • Hand Padstitching is used to attach the interfacing and to shape the garment.
  • Hair Canvas sew-in interfacing is used to shape the garment front, under collar and hems.
  • Taping the lapel roll line and front edges with stay tape is done by hand.
  • Lining is inserted by hand.
Fusible:- Fusible interfacing does not require pad stitching and is made up by machine apart from setting in the lining sleeves and sewing the hems.
  • Fusible interfacing is used to shape the garment front, front facing, upper collar, undercollar and hems.
  • Taping the lapel roll line by machine may be done but taping the front edges is not necessary.
  • Lining is inserted by machine, except for the sleeve lining which is attached by hand.

Machine:- Made up entirely by machine apart from setting in the lining sleeves and sewing the hems.
  • Machine Pad stitching is used to apply interfacing and to shape the under collar: lapels may also be pad stitched by machine.
  • Hair canvas sew-in interfacing is used to shape the garment front, undercollar and hems.
  • Taping the lapel roll line is done by machine and taping the front edges is not necessary.
  • Lining is inserted by machine, except for the sleeve lining which is attached by hand.
Combination:- Made up of different combinations of tailoring methods. Made up of any of the previous methods.

Selecting A Pattern page 14:-Research everywhere to key shapes and details. Go to shops to try them on and see what lengths, fabrics and details suit your figure. Try to pick a shape that is timeless so it will never go out for fashion as they are very expensive when made well. Make sure it will complement your wardrobe.

Time Savers:-
- When time is limited opt for a shawl collar to save time.
- Dolman or raglan sleeve styles also offer easier construction.
- Patch pockets are easier than welt pockets. Welt need careful cutting/stitching and take practise to get right.


Selecting the Right Fabric:- page 16
For first projects wool is recommended as it presses and shapes very easily. Stitching is hidden easily by texture. However hard-surfaced wool worsteds are bad for tailoring. Avoid patterns for first projects because they are complicated.
Three tests for selecting a tailoring fabric:-
  • Crush the fabric in your hands to check resilience. If it creases the fabric will be more difficult to tailor.
  • Push fabric with your thumbs to check durability. If yarns separate and it doesn't recover it's shape it will stretch out of shape when sewing.
  • Test fabric drape by placing fabric over bust line. If fabric doesn't fall into folds it will be difficult to tailor.
 Remember if you use a patterned fabric to line up the pattern so they run and lie properly.
Interfacing page 20:-
  • Sew-in  interfacing:- Use hair canvas for shaping the under collar, lapel and hems. A lightweight woven interfacing or broadcloth are used for back stay like muslin. Lambswool may be used where soft padding is desired such as sleeve heads or to add warmth to the jacket.
  • Fusible interfacing:- different weights will vary the softness of the interfacing allowing for a sharp or soft look. fusible fabric is not suitable for fabric that becomes damaged by prolonged exposure to heat or heavily textured fabrics as it will come off after awhile. Do not use it on fabrics which are treated for water repellent or stain resistant.


Lining page 24:-
Fabric weave:- Satin feels smooth but has float yarns which snags easily. Twill weaves are stronger than plain and satin weaves.  Some lining fabrics have woven jacquard or dobby designs. If the design has long floats, they may catch on watches and jewellery.

Lining colour:- Choose a solid colour which matches or blends with the fabric. Be careful with patterns as they might clash with other garments you might wear with it.

Outerwear lining:- Special lining fabrics for winter coats are available.  There are different weights and properties depending on the lining.


I need to buy this book as it is so amazing for tailoring advice.

Monday 3 November 2014

Notes from Couture Sewing Techinques by Claire B. Shaeffer

This book is wonder for the history of couture and a very in-depth study of how to produce a high class garment. I thought this book would have a great list for appropriate techniques that could be used for making a suit. I was amazed by some of the things the book highlighted.

Needles:-
The higher the number the finer and shorter the needle. Use long needles for long stitches like thread tracing, uneven basting and stab stitches. Use shorter needles for general sewing, short basting stitches, hemming and finishing stitches. Use needles with oval or long eyes for coarse threads and easy threading.

Threads:-
Threads numbered with the higher number meaning the finer the thread. Silk is lettered from A to F, the lower the letter the finer the thread.  Pressing thread into bees wax helps thread stop from knotting as easily.

Fabric Handling:-
When sewing white or pastel fabrics, use talcum or drafting powder to keep hands clean and cry. When sewing fragile fabric with rough hands, use a pumice stone or a mixture of cooking oil and sugar to remove hard skin.

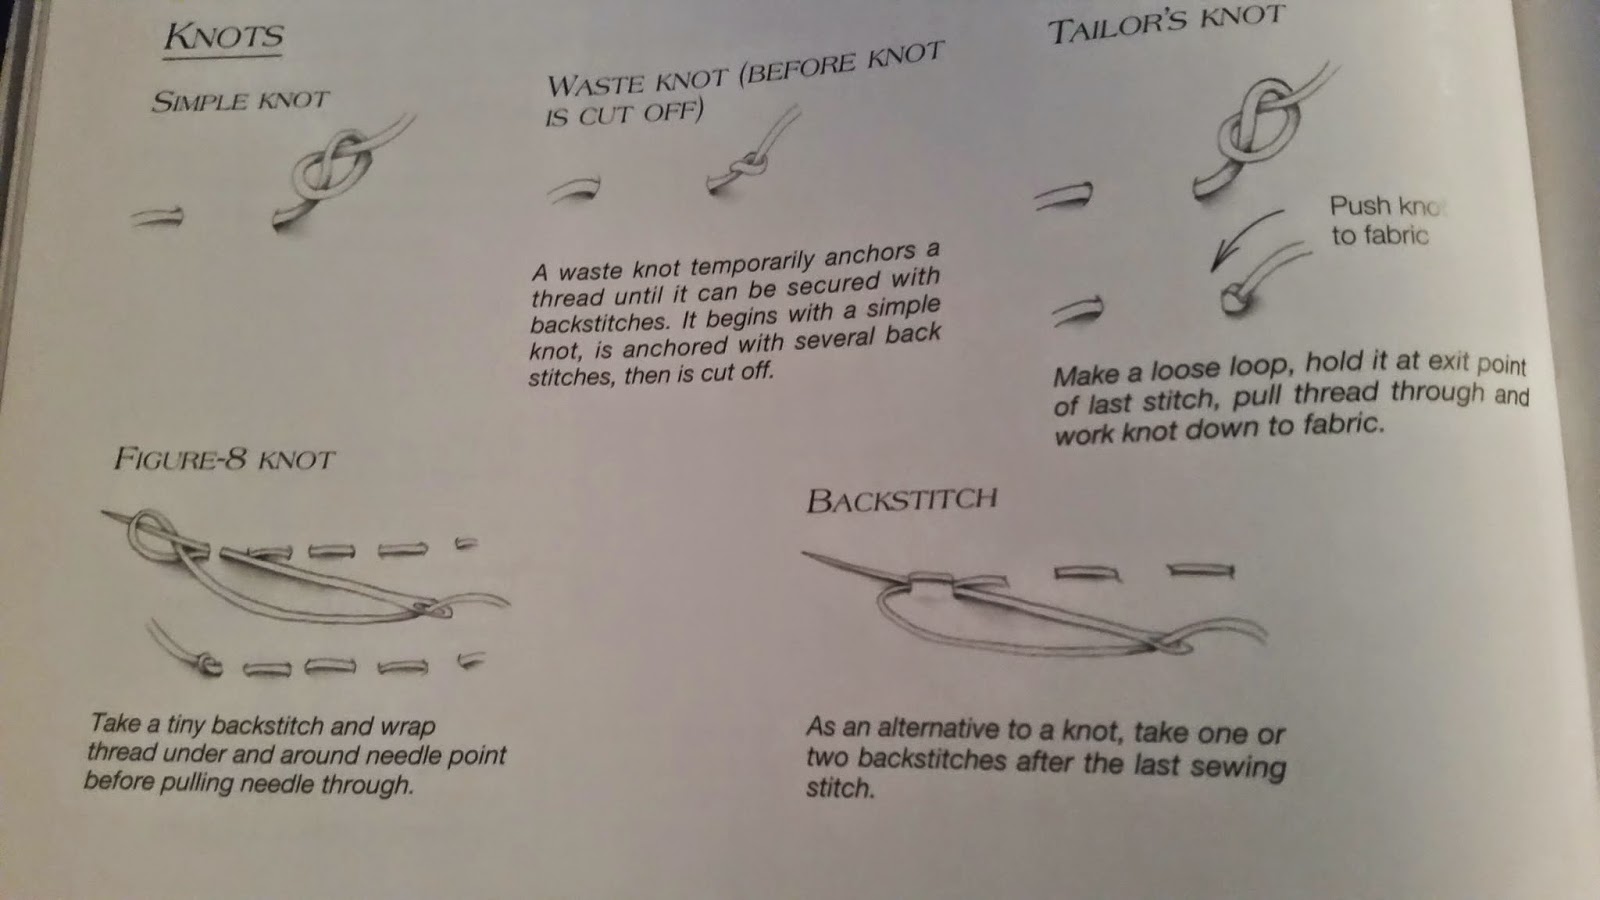
Knots:-


Temporary Stitches:-
Even Basting:- Is a running stitch which measures evenly on both sides of the seam. This is used to prevent movement during construction between two or more layers of fabric. This stitch can be doubled up so that one thread runs in between the other.
Top Basting:- This is when an even or uneven basting is applied to the right side of the fabric to make it look top stitched like jeans at the seam.
Lap Basting:- This is used for bias seams that are stretched when stitched. Use an even basting stitch for 6 inches then stop cut the thread leaving a tail and start again from the point of the tail. Keep going all the way along the seam. Fastening with back stitches. (See picture to the left)
Uneven Basting:- Is a running stitch with one side of the seam longer than the other. This is used  for marking garments, basting hems and straight seams when they don't need to be strong. When using this technique make sure you keep the fabric taut.
Diagonal Basting:- This is used to hold pleats, backing and interfacing to the fabric. Hold the fabric vertically and insert the needle horizontally from right to left. Pull thread through and push through either above or below that stitch. On one side of the fabric it will create diagonal lines and on the other it will create columns or dashes.
Cross Stitching:- This is a variation on diagonal basting were two rows of diagonal stitches in opposite directions are places on top of each other. This is used to mark the right side, front of the garment during construction.
Slip Basting:- This is used on the right side of the fabric when matching stripes and plaids. The fabric edges lap each other or fold over one another. Slip basting is the same technique as slip stitch just not permanent. Fold seam over and place it over the edge of the one below. Match any pattern as needed and pin. Work from right to left, taking the thread through the fabric diagonal. where it comes out sew it straight through the other side to make a dash. Continue all the way along. 

Permanent Stitches:-
Running Stitch:- A small even running stitch used for seams which need very little strength such as pockets, lining, setting zips or securing folds of draping.
Slip Stitch:- This is used to attach fabric from the right side of the fabric. Example waistline seam, intricately shaped seam, hems or folded edges of a waist belt. Make sure to use a single thread. Fold the seam allowances back and pin. Catch each side of the seam as you work along the seam until it's closed. It should look like a ladder.
Fell Stitch:- This is similar to slip stitch but used over one folded edge and one raw edge. This is used to set in an under collar, waistband or sleeve. Used for flat-felled seams, finishing narrow and rolled hems.
Whip Stitch:- This is used to finish a hem. It's also used to make narrow seams and join lace. To whip stitch, insert through the back of the fabric through all layers. Draw it back through and keep going all the way along.
Baseball Stitch:- This is used to join two abutted edges without seam allowances. Start with right sides up, insert the thread into the back of the fabric and pull through. Move along a centimetre and push the needle through the wrong side of the fabric. Keep going along.
Stab Stitch:- This stitch is used for binding buttonholes, pockets, setting shoulder pads, zippers and joining especially thick fabric layers. With the garment right side up, stab the through with a small stitch and make the stitch on the other side a little longer. Continue like this all the way along.
Diagonal Stitch:- This is used to shape collars and lapels. This is also known as padstitching, this attaches the padstitch to the chest canvas.
Catch Stitch:- It looks like a row of Xs on the right side of the fabric and looks like two rows of parallel dashes on the wrong side. This stitch is very elastic, this is used to make casings for elastic and tapes. This it also used to tack pleats.


Over-catching Stitch:- This works with the whipstitch which crosses over it to create an X. Stitches are small. This helps with seams not ravelling.
Backstitch:- a sturdy hand stitch for seams and decoration. It's often used for setting sleeves. On one side it creates a join line of stitching and on the other a line of over lapping lines.

Hemming Stitches:-
Blindstitch:- This is the most frequently used hemming stitching. This hem is hidden between the garment and the hem. Work from right to left, catch each side of the hem with a tiny stitch to create a zig-zag along the seam.
Blind Catch Stitch:- This is a much stronger, durable and more elastic than the blindstitch and is used for hemming heavy fabrics. You work from left to right this time, create the zig-zag again but double back to make it stronger.

Tailors Tacks:- This is used to mark wool fabrics.This is used to mark on pattern markings required to manufacturing the garment much as seams, darts, openings for pockets etc. They will be removed after construction.


Abutted and Butted Seam:- A flat seam joining two plies, edge-to-edge, without overlay
or seam allowance. This is done with a zig-zag stitch, sometimes this has fabric behind to help it hold together.

Stitch images taken from:- http://en.wikipedia.org/wiki/List_of_sewing_stitches